
GitLab CI Part 1
Continuous Integration(CI) and Continuous Delivery (CD) become more and more popular and important in software development, but today I will not talk about why CI/CD, but focus on the hands-on stuff instead.
I choose GitLab CI as the solution, and will explain the reason later, that in this series of posts, I will cover the following topics:
- Why GitLab CI? And it’s pipeline and architecture
- How to setup runner for GitLab CI/CD
- .gitlab-ci.yml introduction
- Real practice with NodeJS, Android, and iOS CI setup
First, this ariticle will give you the basic understanding of how it works.
Why GitLab CI
First, GitLab CE provides the unlimited repositories and members for free :p
Regarding CI we go with Jenkins at the beginning, but I don’t like its ui style :p, and the configration is a little bit complex. Given that, I start to look around and find the GitLab’s latest version (10.x) has enabled CI by default, which means we don’t need to login to another website to check the CI status.
Besides, the CI pipeline runner can be installed at any kinds of instance easily, and pipeline can be configured in the .yml and can be managed in the same repository of git.
Last, there is nothing blocking my team’s main ci process so far (Yes, there are something wanted features not supported by CE version.)
Pipleline

As you can see, pipeline is the set of definition of build, test, deploy, and triggered by commit(mostly). Once we define the step in the .yml, the registered runner will take care all of these stuff automatically.
Architecture
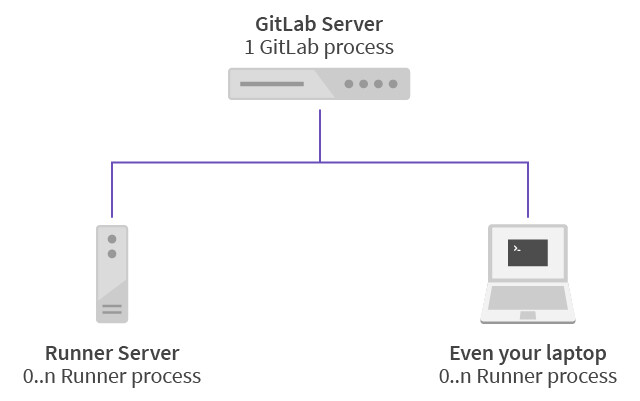
GitLab CI architecture is really simple - once GitLab server as the git respository, one there is any gitlab runner registered, the related-jobs would be dispatched correspondingly, and report its result (console log) to GitLab server.
With the basic concept, I will detail the steps about how to setup up it in the following posts.
Til next time,
abawchen
at 09:27